

SUBSCRIBE
Get on the list and let’s become friends. Join our community of like minded women, and get all my latest recipes, finds and personal stories. I’m so happy you’re here.

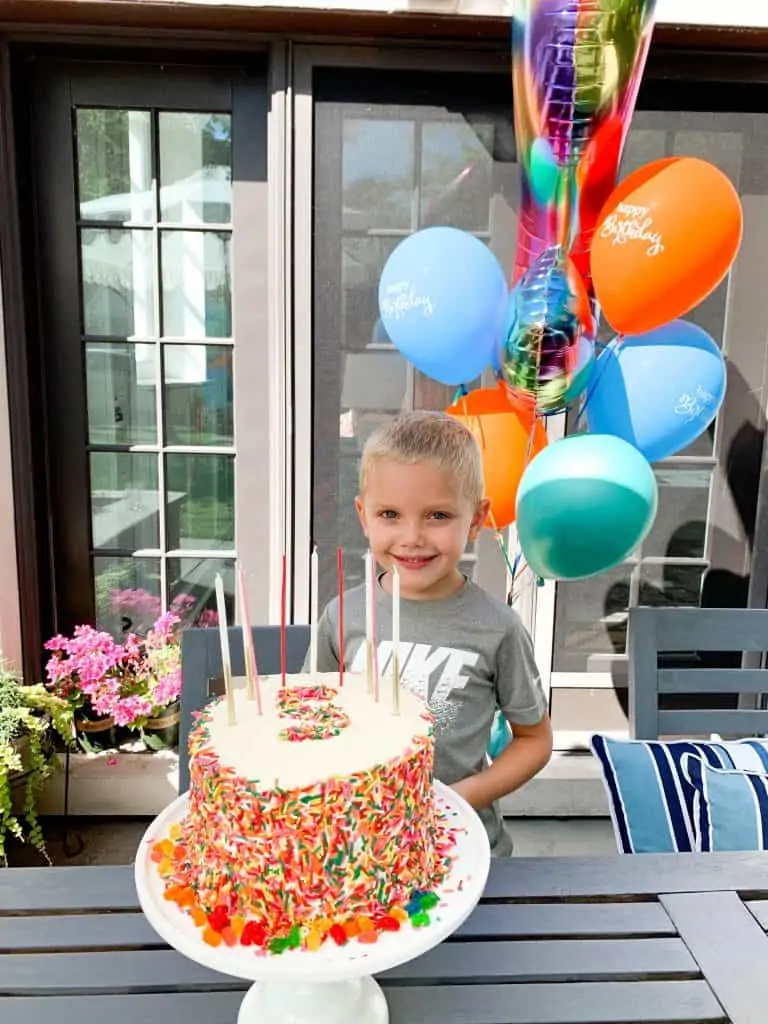
Easy way to make a homemade birthday cake
Ok you guys, so here’s the thing, I am NOT a baker. Like really not a bake. But my kiddos love homemade birthday cakes. There’s something really special about someone baking you a birthday cake from scratch. You just feel important.
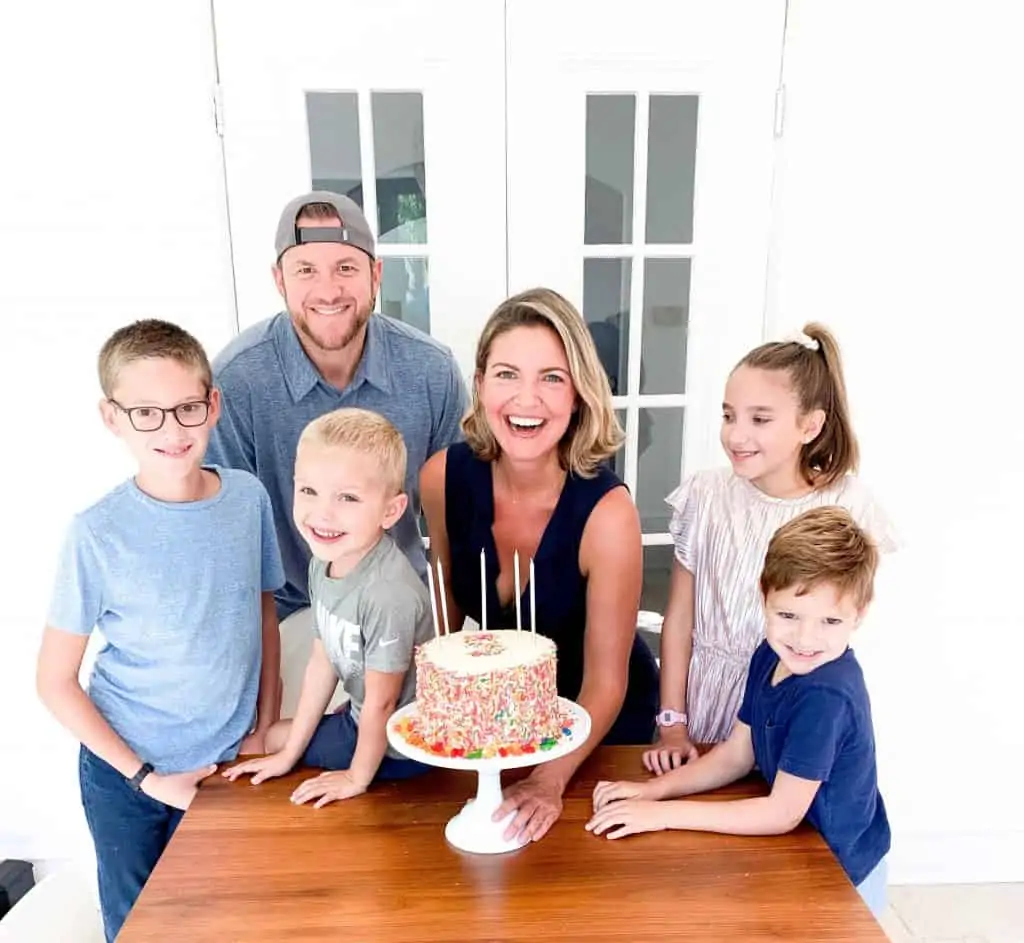
So with Frankie’s birthday this week, the kids and I wanted to do something a little special. We thought it would be fun (and by fun, I mean…..make a mess, everyone fights, and cries, and mom ends up yelling – yes, that kind of “fun”) to work together to come up with something really special for him.
First, we had to decide on a cake that we could actually bake. Frank insisted on chocolate (thank goodness, I kind of hate baking vanilla cakes). I scoured the internet for THE BEST chocolate cake recipe and ended up going with this one from The Barefoot Contessa, called Beatty’s chocolate cake. And let me tell you….it’s THE cake to bake. It uses buttermilk (which we love in this house) and a full cup of coffee. Plus it’s honestly really easy. The kids actually made the batter on their own and you don’t need a mixer.
Now the hard part – decorating it. The kids and I spent a little time looking at all of the overly perfect cakes on Pinterest. They asked for about three dozen intricately decorated cakes -all of which I said “heck no” to before we came up with an idea I could actually attempt.
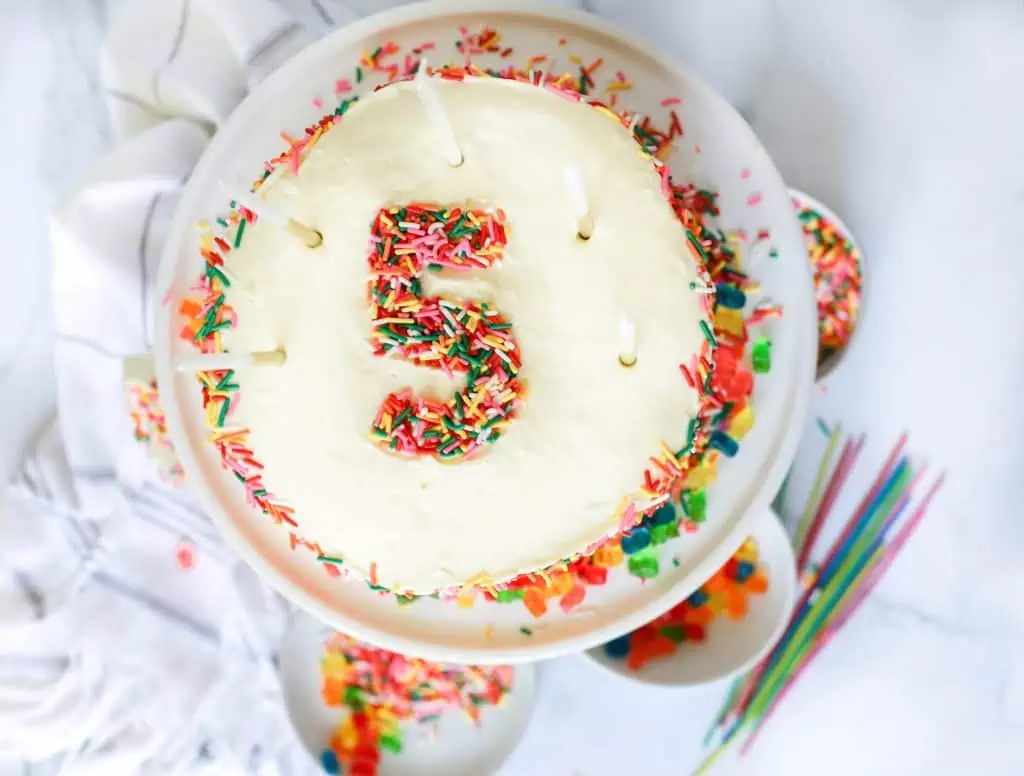
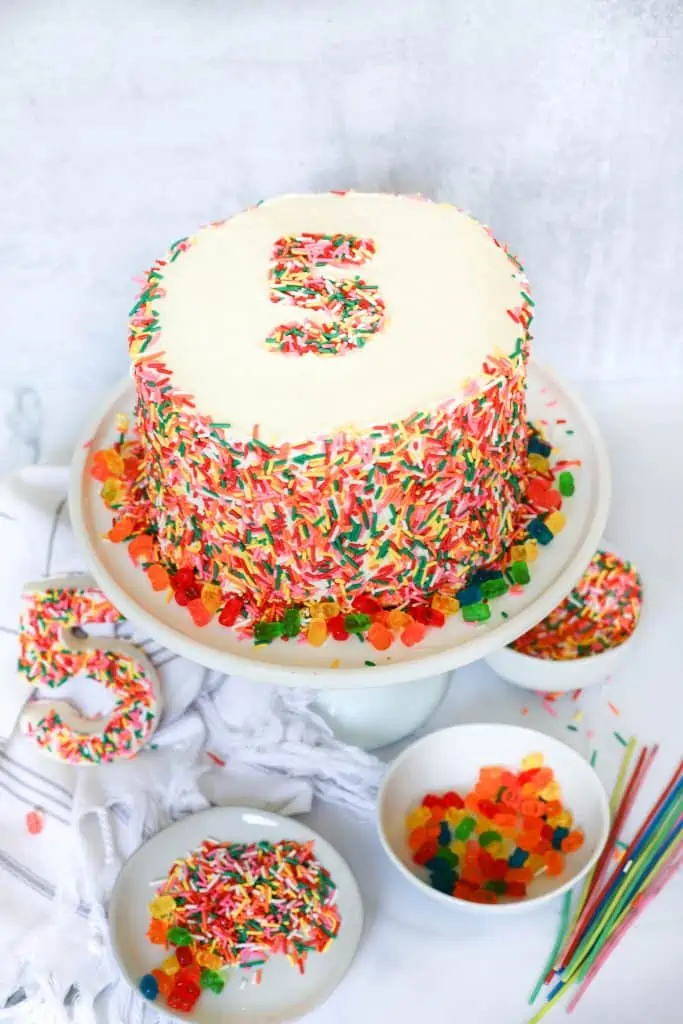
Our plan was simple….white frosting, cover the sides in sprinkles and then make a “5” out of sprinkles. That we could do 😉
 For the frosting, I just used this basic buttercream frosting from the Kitchn. Nothing fancy. Basically just butter and powdered sugar (if you’re wondering how healthy this cake was….it wasn’t. lol). But honestly, any frosting you like would work.
A couple of key things I wanted to share that have helped me over the years with baking birthday cakes.
- Freeze your cake before decorating it. If you’re doing a layer cake, bake your cake the day before you want to decorate it. Once it’s done cooling, wrap it in plastic wrap and place it in your freezer and let it freeze overnight. You can decorate it right from the freezer. There’s something about “freezing” your cake that makes it really dense and moist.
- “Crumb coat” your cake before adding your final layer of frosting. “Crumb coat” is just a basic technique of putting a thin layer of frosting on your cake, and allowing it to “set”, before adding additional frosting. I like to use a separate bowl of frosting (so your frosting doesn’t get any crumbs in int) when I “crumb coat” a cake and then place in in the fridge (or even the freezer) for a good 30 minutes or so before adding my final coat of frosting.
- Use the right tools. I love to use a good frosting spatula to apply my frosting and then a bench scraper to “clean up” the sides and the edges. Using the right tools makes such a difference. Even an inexpensive set like this works great.
- Use water to help “smooth” out your frosting. Dipping your spatula/scraper/knife/whatever in warm water before using it on your frosting will just help smooth out those little imperfections.
- Have fun with it. The thing about decorating cakes (or really any cooking) is that you can’t overthink it. Once you start “overworking” anything it starts looking a little….well..not so great. So just go with it. Have some fun and let it be perfectly imperfect. Besides a homemade cake should LOOK HOMEMADE!
Once we had the cake all baked, frosted, and ready to go, it was time for the fun part. The sprinkles. I used a really fancy technique I learned in culinary school (I’m hoping you sense the sarcasm here ;), called “smoosh the sprinkles on with your hand”. I placed the cake on a big cookie sheet so the sprinkles didnt’ go all over the floor and then we used our little hands to literally just “press” the sprinkles into the side of the cake. And it actually kind of worked great. The edges weren’t clean or neat. But it worked! And it was fast and didnt’ make a mess. So win win in my book.
To make the “5”, I made my own stnecil by cutting out the number five from a pecie of craft paper. Literally that was it. Just a piece of paper and some craft scissors. Then I placed the stencil on the top of the cake and covered it with sprinkles. It sort of didn’t really work because the frosting all stuck to the stencil (hahah). A few sweet readers on here shared with me that I supposed to spray the paper/stencil with non-stick cooking spray so the frosting doesn’t stick. Ugh. That would have been so much easier. It’s a good thing no one was looking too closely at my cake.
But even with frosting kind of smudged now, and the number five looking a little wonky, it worked. It wasn’t perfect, and you couldn’t look too close, but it still really stinking cute.
I am sort of blown away with what the kids and I were able to create. And although a bakery or store-bought cake for sure would have been prettier – there’s something so amazingly sweet and special about a homemade cake. I love how our homemade cake turned out – smudged frosting and all. It was honestly perfect in every way. I already excited about the next birthday when we can make this again.
Happy birthday to my little five-year-old – and happy baking to all of you.
xoxo
And for other fun sweet treat inspiration, be sure to check out our favorite dark chocolate and olive oil cookies. Another yummy sweet treat for any birthday.
LEAVE A COMMENT & RATE