

SUBSCRIBE
Get on the list and let’s become friends. Join our community of like minded women, and get all my latest recipes, finds and personal stories. I’m so happy you’re here.
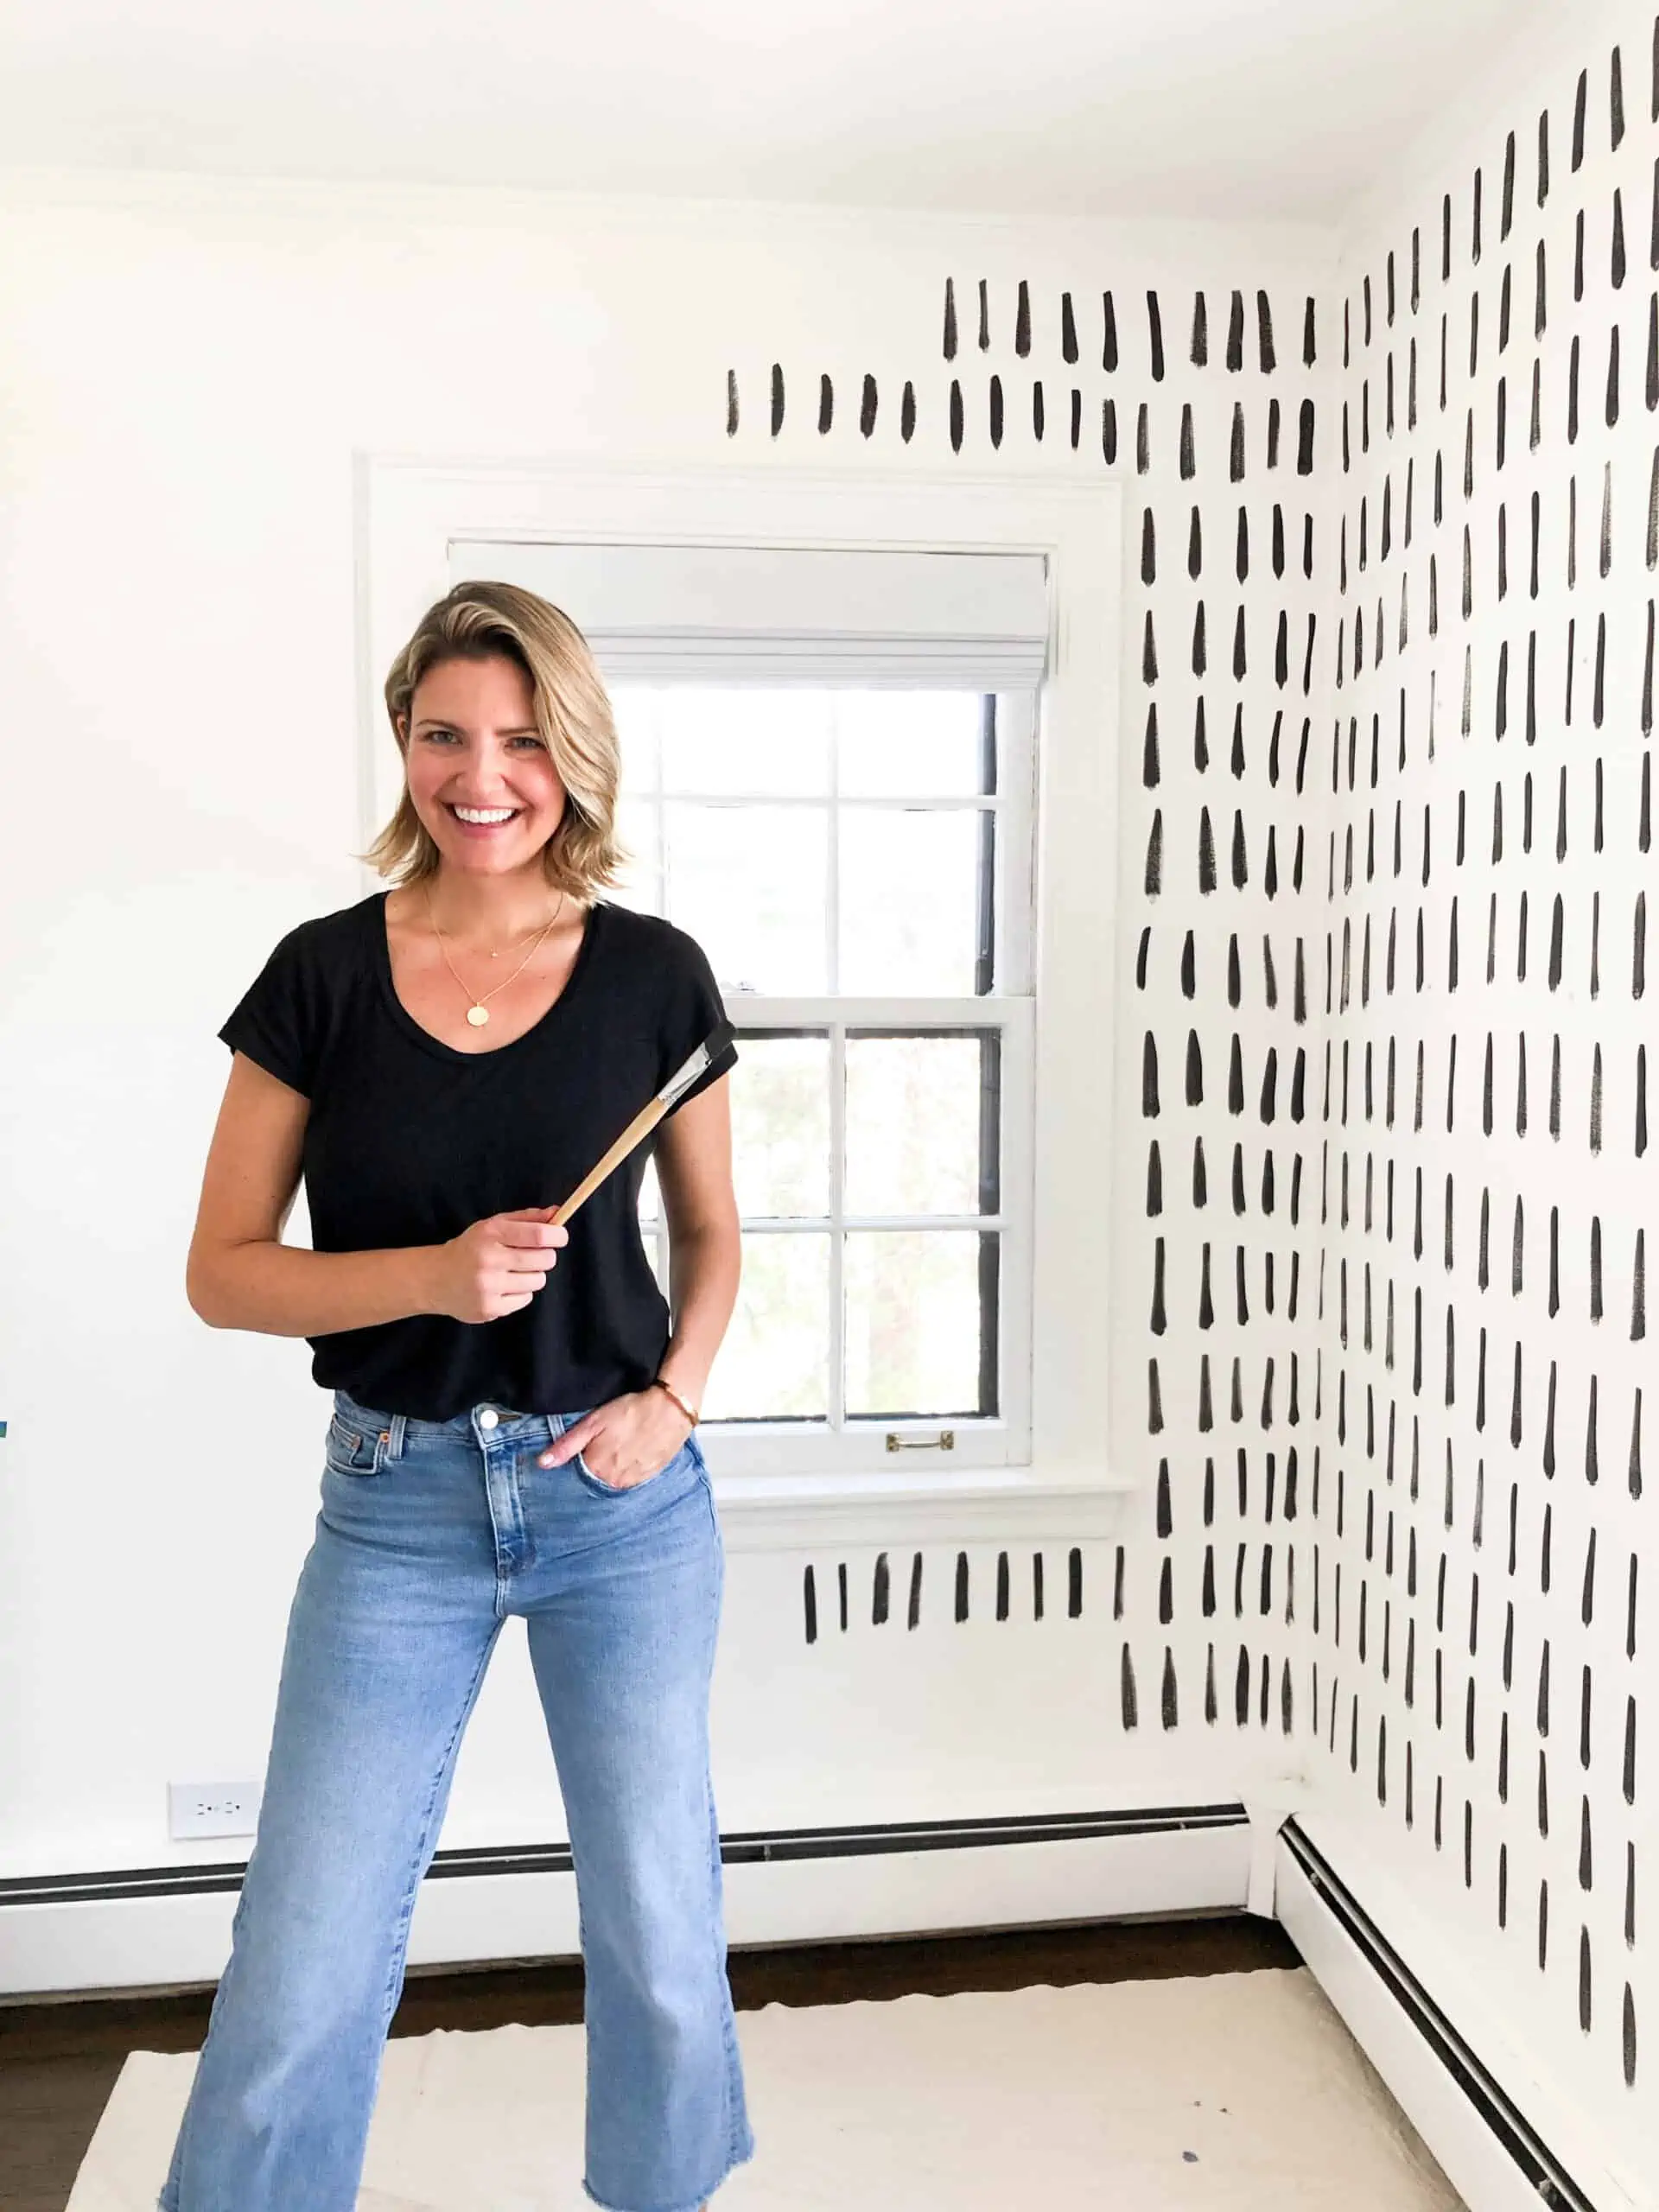
How to “paint” your own wallpaper
I tend to be a pretty all or nothing kind of a girl. When I set my mind to something, I’m gonna do it — no matter what.
So when I had a vision for how I wanted to decorate Frankie’s bedroom, nothing was going to stop me. Not even back-ordered wallpaper.
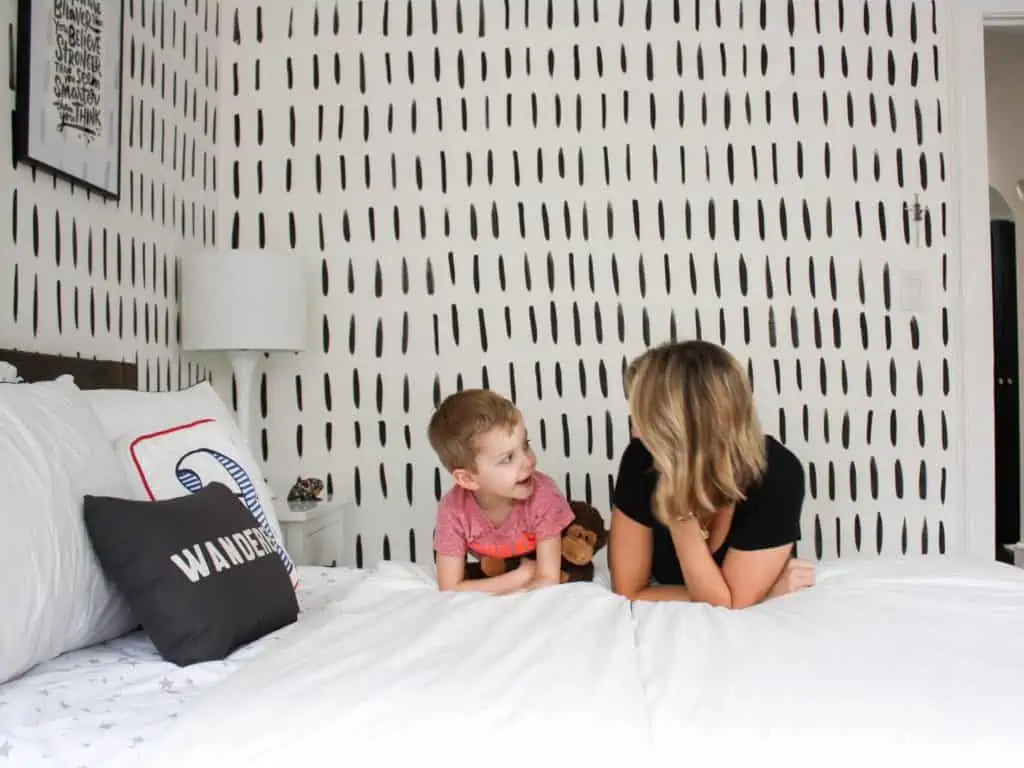
When I originally planned out Frankie’s bedroom makeover – I had a vision that was all based on this super cool, chic black and white graphic wallpaper. I had been wanting to use it for years, and this bedroom makeover was finally going to be my chance.
I purchased all of his bedding, lighting, artwork, and accessories all based on this specific paper. So when I found out at the last minute that the paper was NEVER going to arrive – I decided to take it my own hands.
I had two options, find something new (in the middle of a pandemic none the less). Or work with what I had. But leaving these walls white was NOT an option.
Once I decided I was going to “work with what I had” and “paint” wallpaper myself, it was game ON. Now all I needed was to figure out WHAT I was going to paint and HOW I was gonna do it.
I knew two things. I wanted something black and white, and I wanted something geometric. But the exact shape, pattern, and size were still unclear (and black paint on a wall isn’t something you can really play around with).
So I grabbed an old cardboard box that was laying around and tested out a few brush strokes.
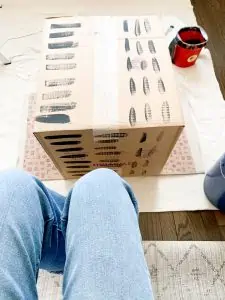
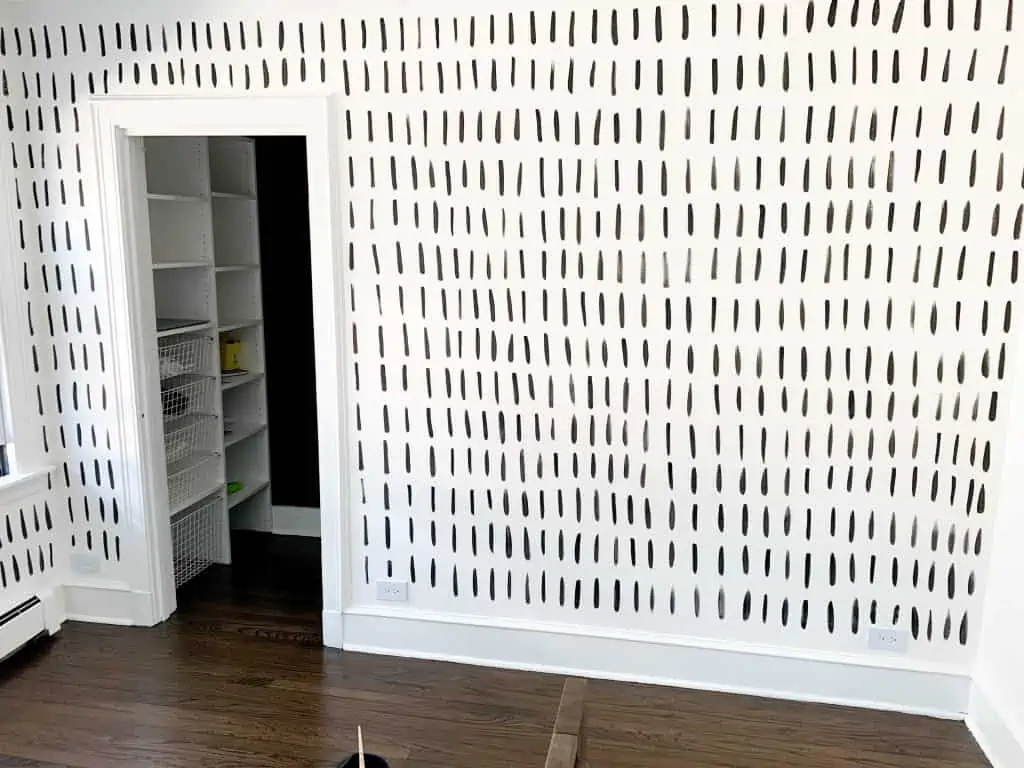
I loved the way the horizontal lines looked (and will definitely use them for another project), but Frankie’s room is pretty small, so I chose the vertical lines hoping it would draw your eye up and make his ceilings look a little taller.
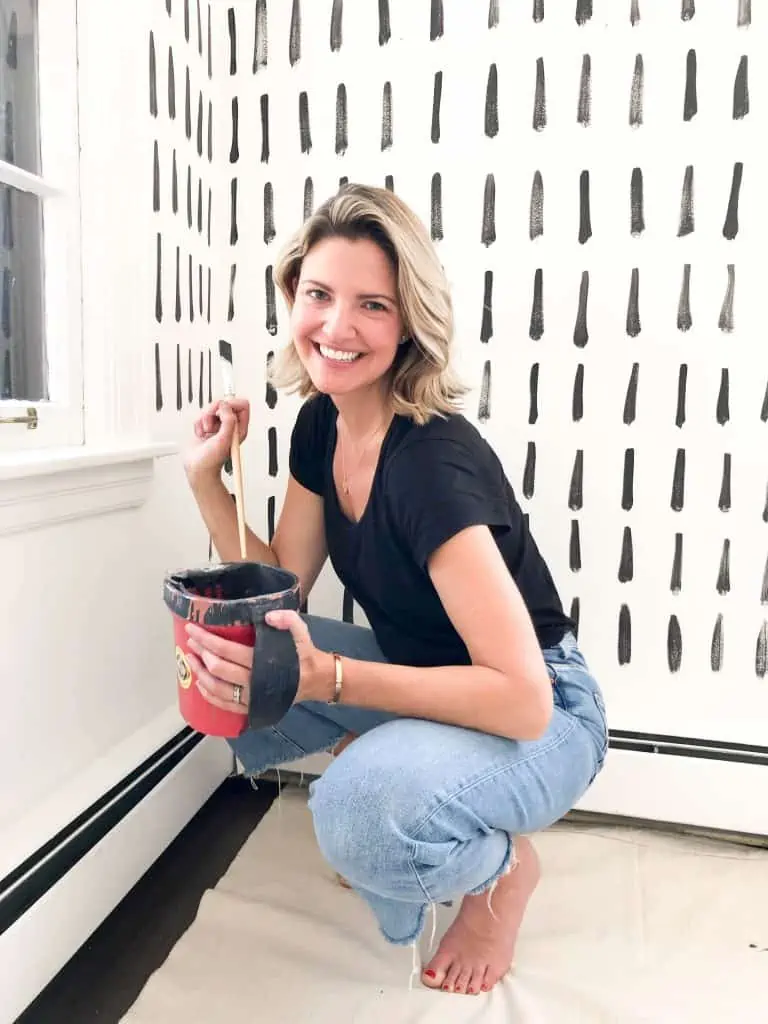
All of the walls, ceiling, and molding in Frankie’s room is painted Simply White by Benjamin Moore (you can read more about my favorite white paint colors here). For the lines, I went with one of my favorite “blacks”, Black Panther by Benjamin Moore. Black panther is a great neutral black. It’s a little warmer and softer than a true black, but doesn’t read green or blue, but rather a dark smoky, almost black.
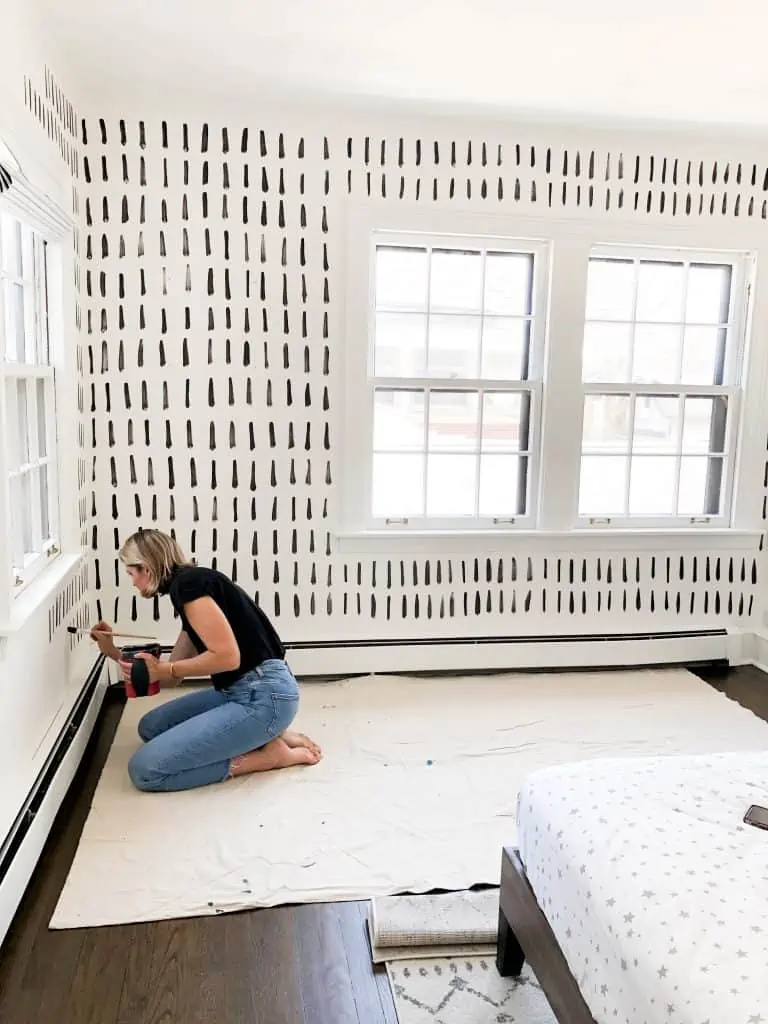
Next was to decide on the height of each “line”. I really can’t say I had a “plan”, I just knew I didn’t want them too small and to feel too busy, and I wanted a decent amount of space between the lines. I ended up going with a 4-inch line, and then roughly an inch or two above and below each row.
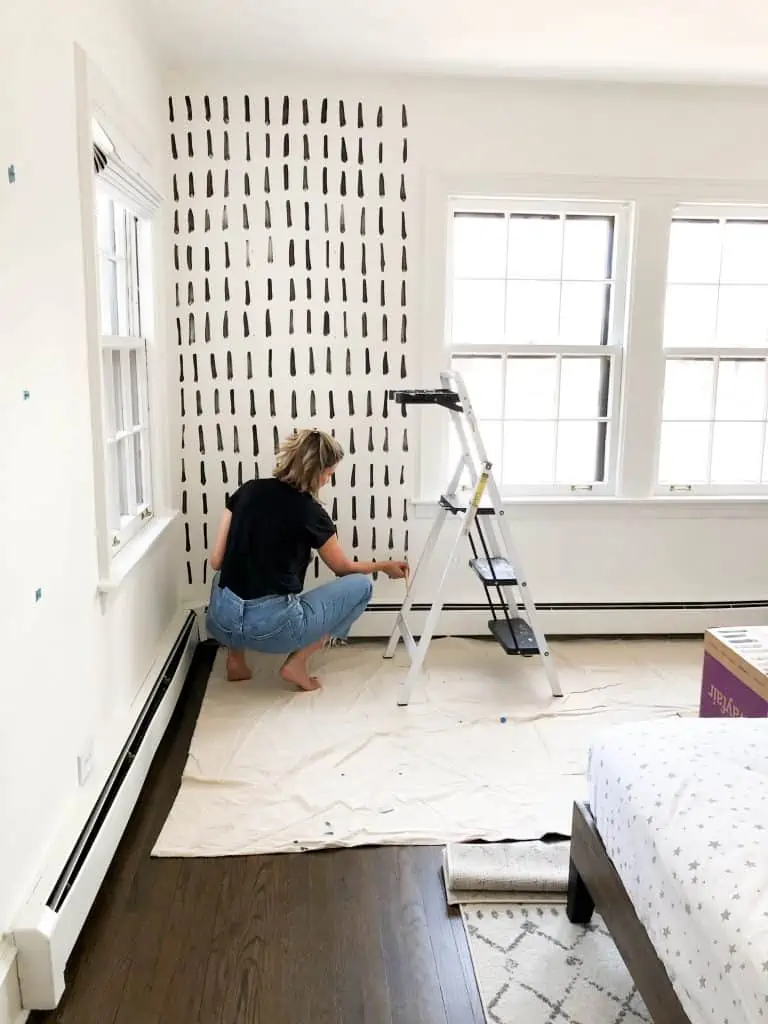
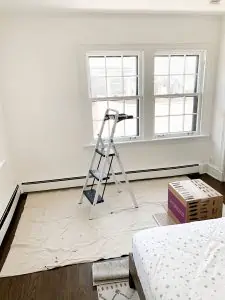
The big “ah-ha” moment for me here was recognizing that I couldn’t try and make the lines “perfect”. Part of the “cool” factor would be allowing for imperfections. Creating movement and texture. I knew I had to let it feel organic and just go for it. Which worked out great because I hate measuring, and JP’s always teasing me that I paint too fast – so this was right in my wheelhouse. I was gonna wing it (with black paint).
But just to give JP a little peace of mind (as he watched me walk across the room with a brush dripping with black paint), I did a quick measurement of the walls and determined I could get 14 rows in. I then made a very light pencil mark at the end of each wall with where I wanted each row to start. Then I just had to make it from one side to the other without getting too wobbly. I love a good challenge. Bring it.
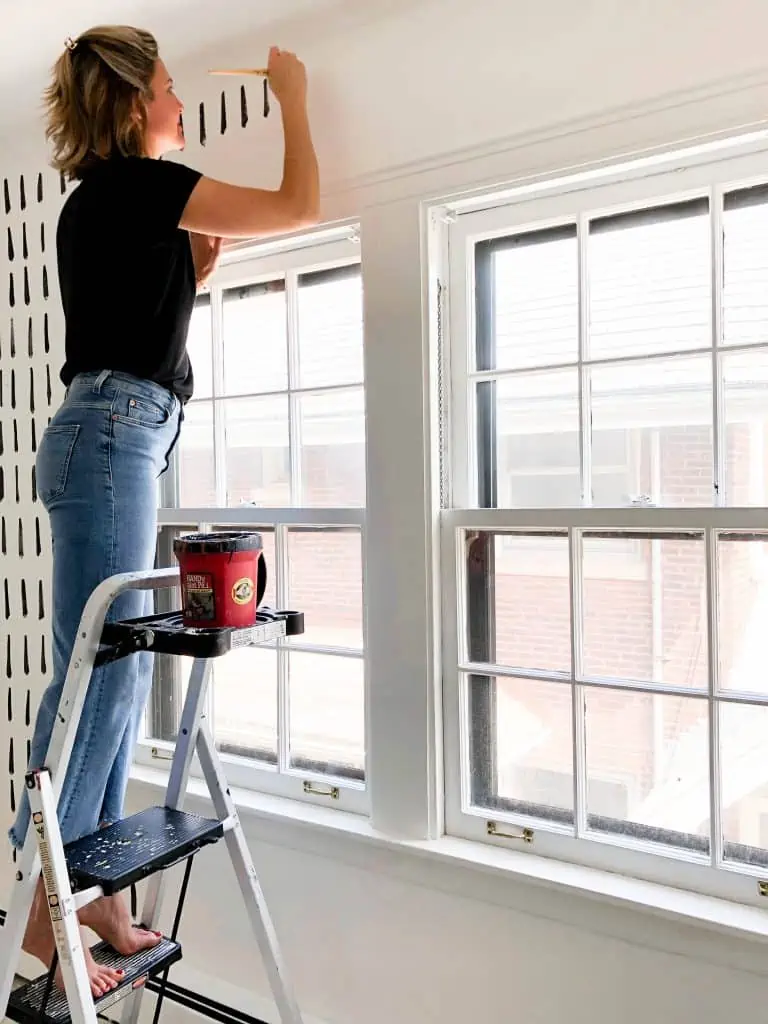
The first wall was for sure my worst (note to self, I should NOT have started with the main wall EVERYONE SEES! ;). I think I held my breath the whole time and I was still trying to make it kind of perfect. But once the first wall was DONE – I felt so much more confident moving to the other walls.
Once I moved on to the rest of the walls, I was much faster and efficient with my brush strokes. A couple of things I noticed along the way.
1. The lighter I pushed on the brush, the better the strokes were. A softer touch is definitely better with this.
2. Having different amounts of paint on the brush created great texture variation. Some lines are really dark and crisp, while others are more feathered and softer.
Again, allowing for more “imperfections” and variations actually helped with this project a lot.
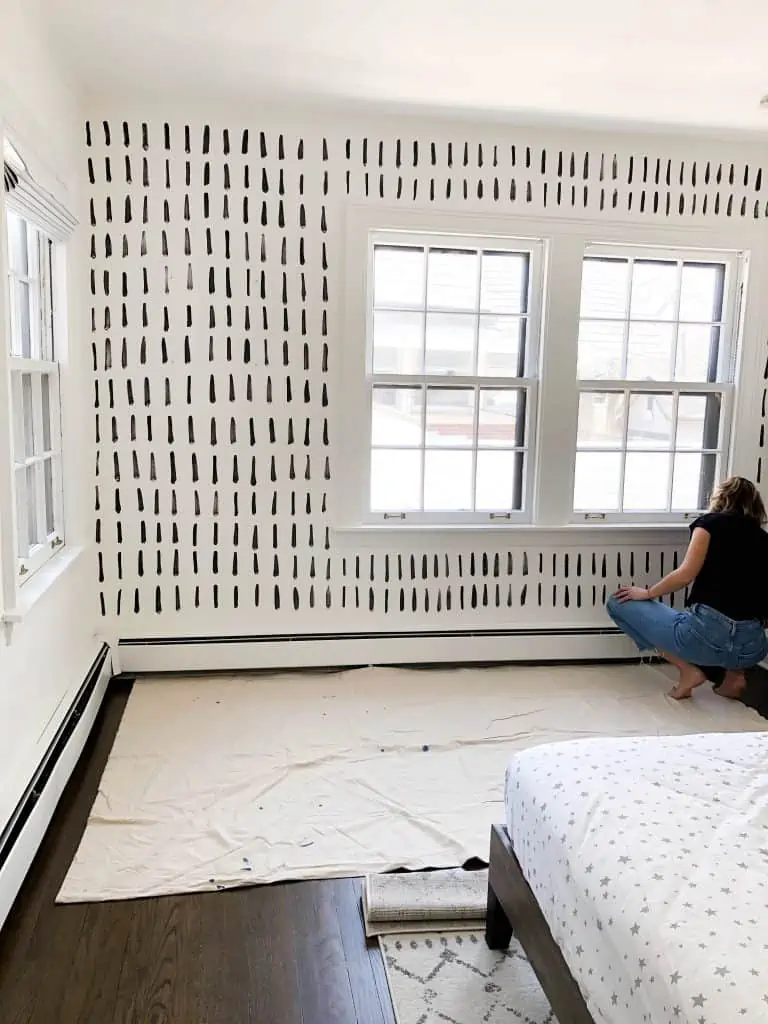
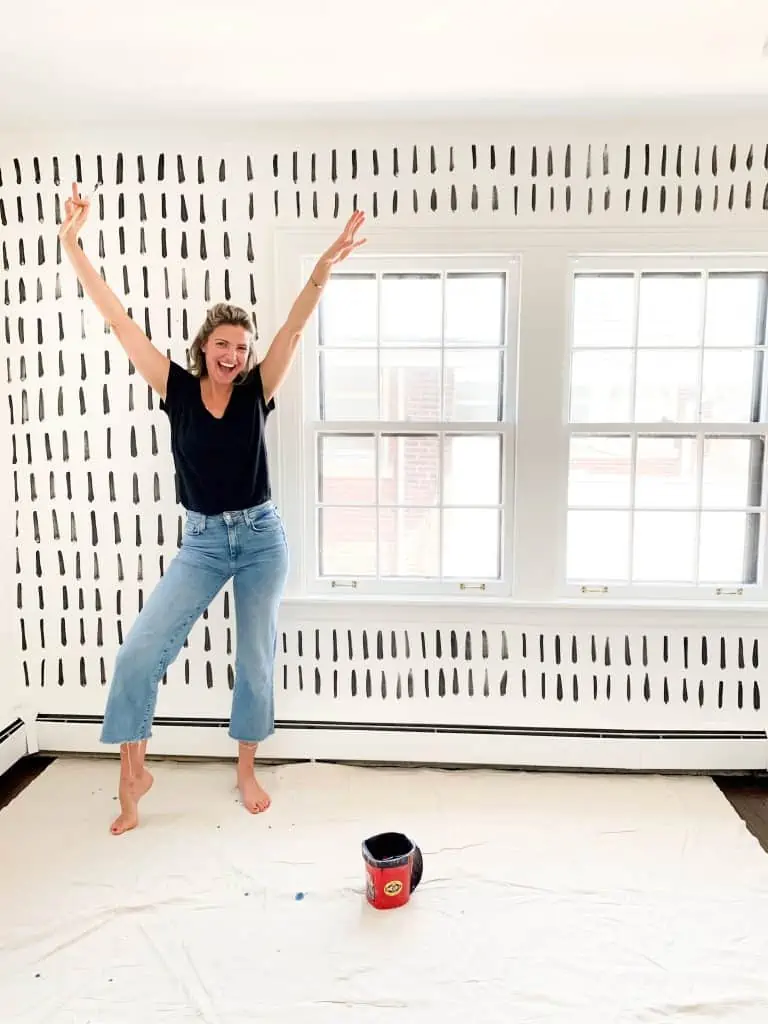
Overall, I’m so happy with how this project turned out. It took me about 2 hours from start to finish, and cost $20 for a quart of paint.
But even more so, I’m so excited to try this technique again in different spaces in our home. There are so many possibilities when it comes to hand-painting wallpaper and it’s honestly so much easier than it seems. If you have a space in your home that could use a little “love”, there is no simpler way than with a can of paint, a brush and a little guts.
And to read more about Frankie’s bedroom makeover you can check out my full blog post here.


LEAVE A COMMENT & RATE
Hi Katy,
I absolutely LOVE the ideas you come up with. Carrie is a bit like you. She loves to decorate with whatever she can get her hands on that is inexpensive. She even learned to do drywall.
Right now she removed and is in the process of replacing a vanity in her son Trenton’s bathroom.
Your family is just adorable.
Ken and I had the best time last summer with your parents and the rest of the Kaslers at Boyne.
Love, love ,love family.