


SUBSCRIBE
Get on the list and let’s become friends. Join our community of like minded women, and get all my latest recipes, finds and personal stories. I’m so happy you’re here.

How to paint furniture like a boss
You’ve probably heard me say this a million times before on here; there is no easier, or cheaper, way to transform a space – or a piece of furniture – than with paint.
And friends, let me be the first to tell you that even YOU can paint. AND you can paint just about anything!
Over the years I’ve painted everything from bathrooms, and stairs to doors and floors (I’m dying to try our kitchen backsplash next) – but my favorite thing to paint is a great piece of furniture. And this one did not disappoint.
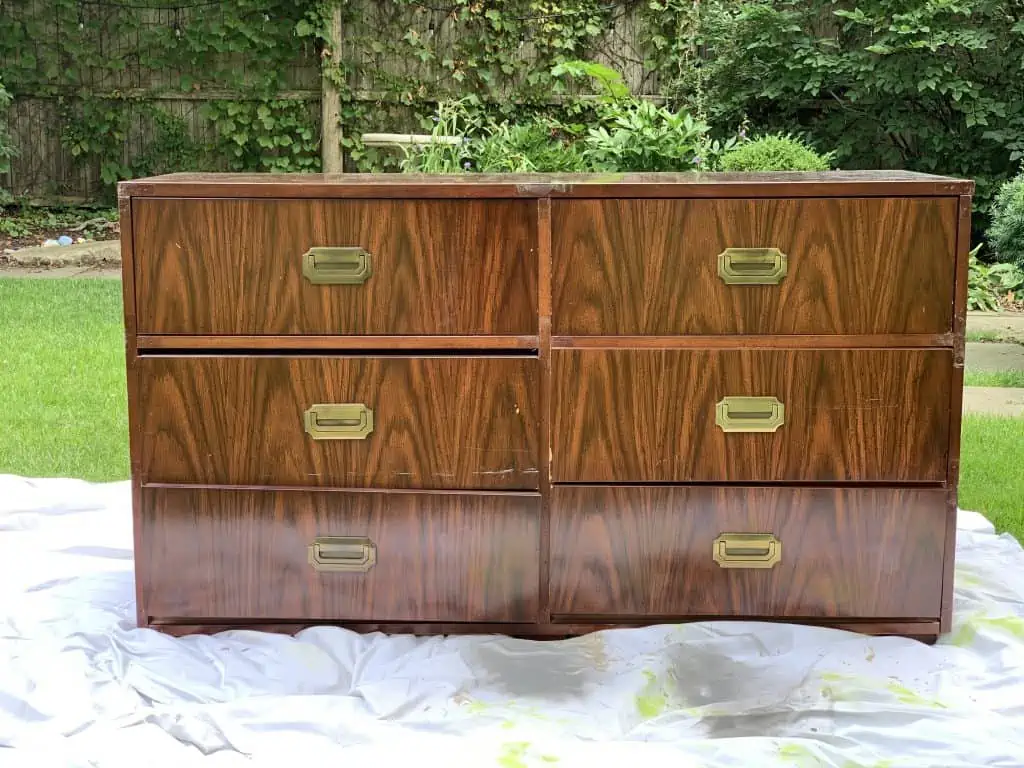
This old dresser has been with us for years. An old friend of mine found it for me at an antique store and bought it for me (thank you, Tiff). Since then it’s moved with us across the country (and back again) and is FINALLY (after all of these years) getting the transformation I always dreamed of.
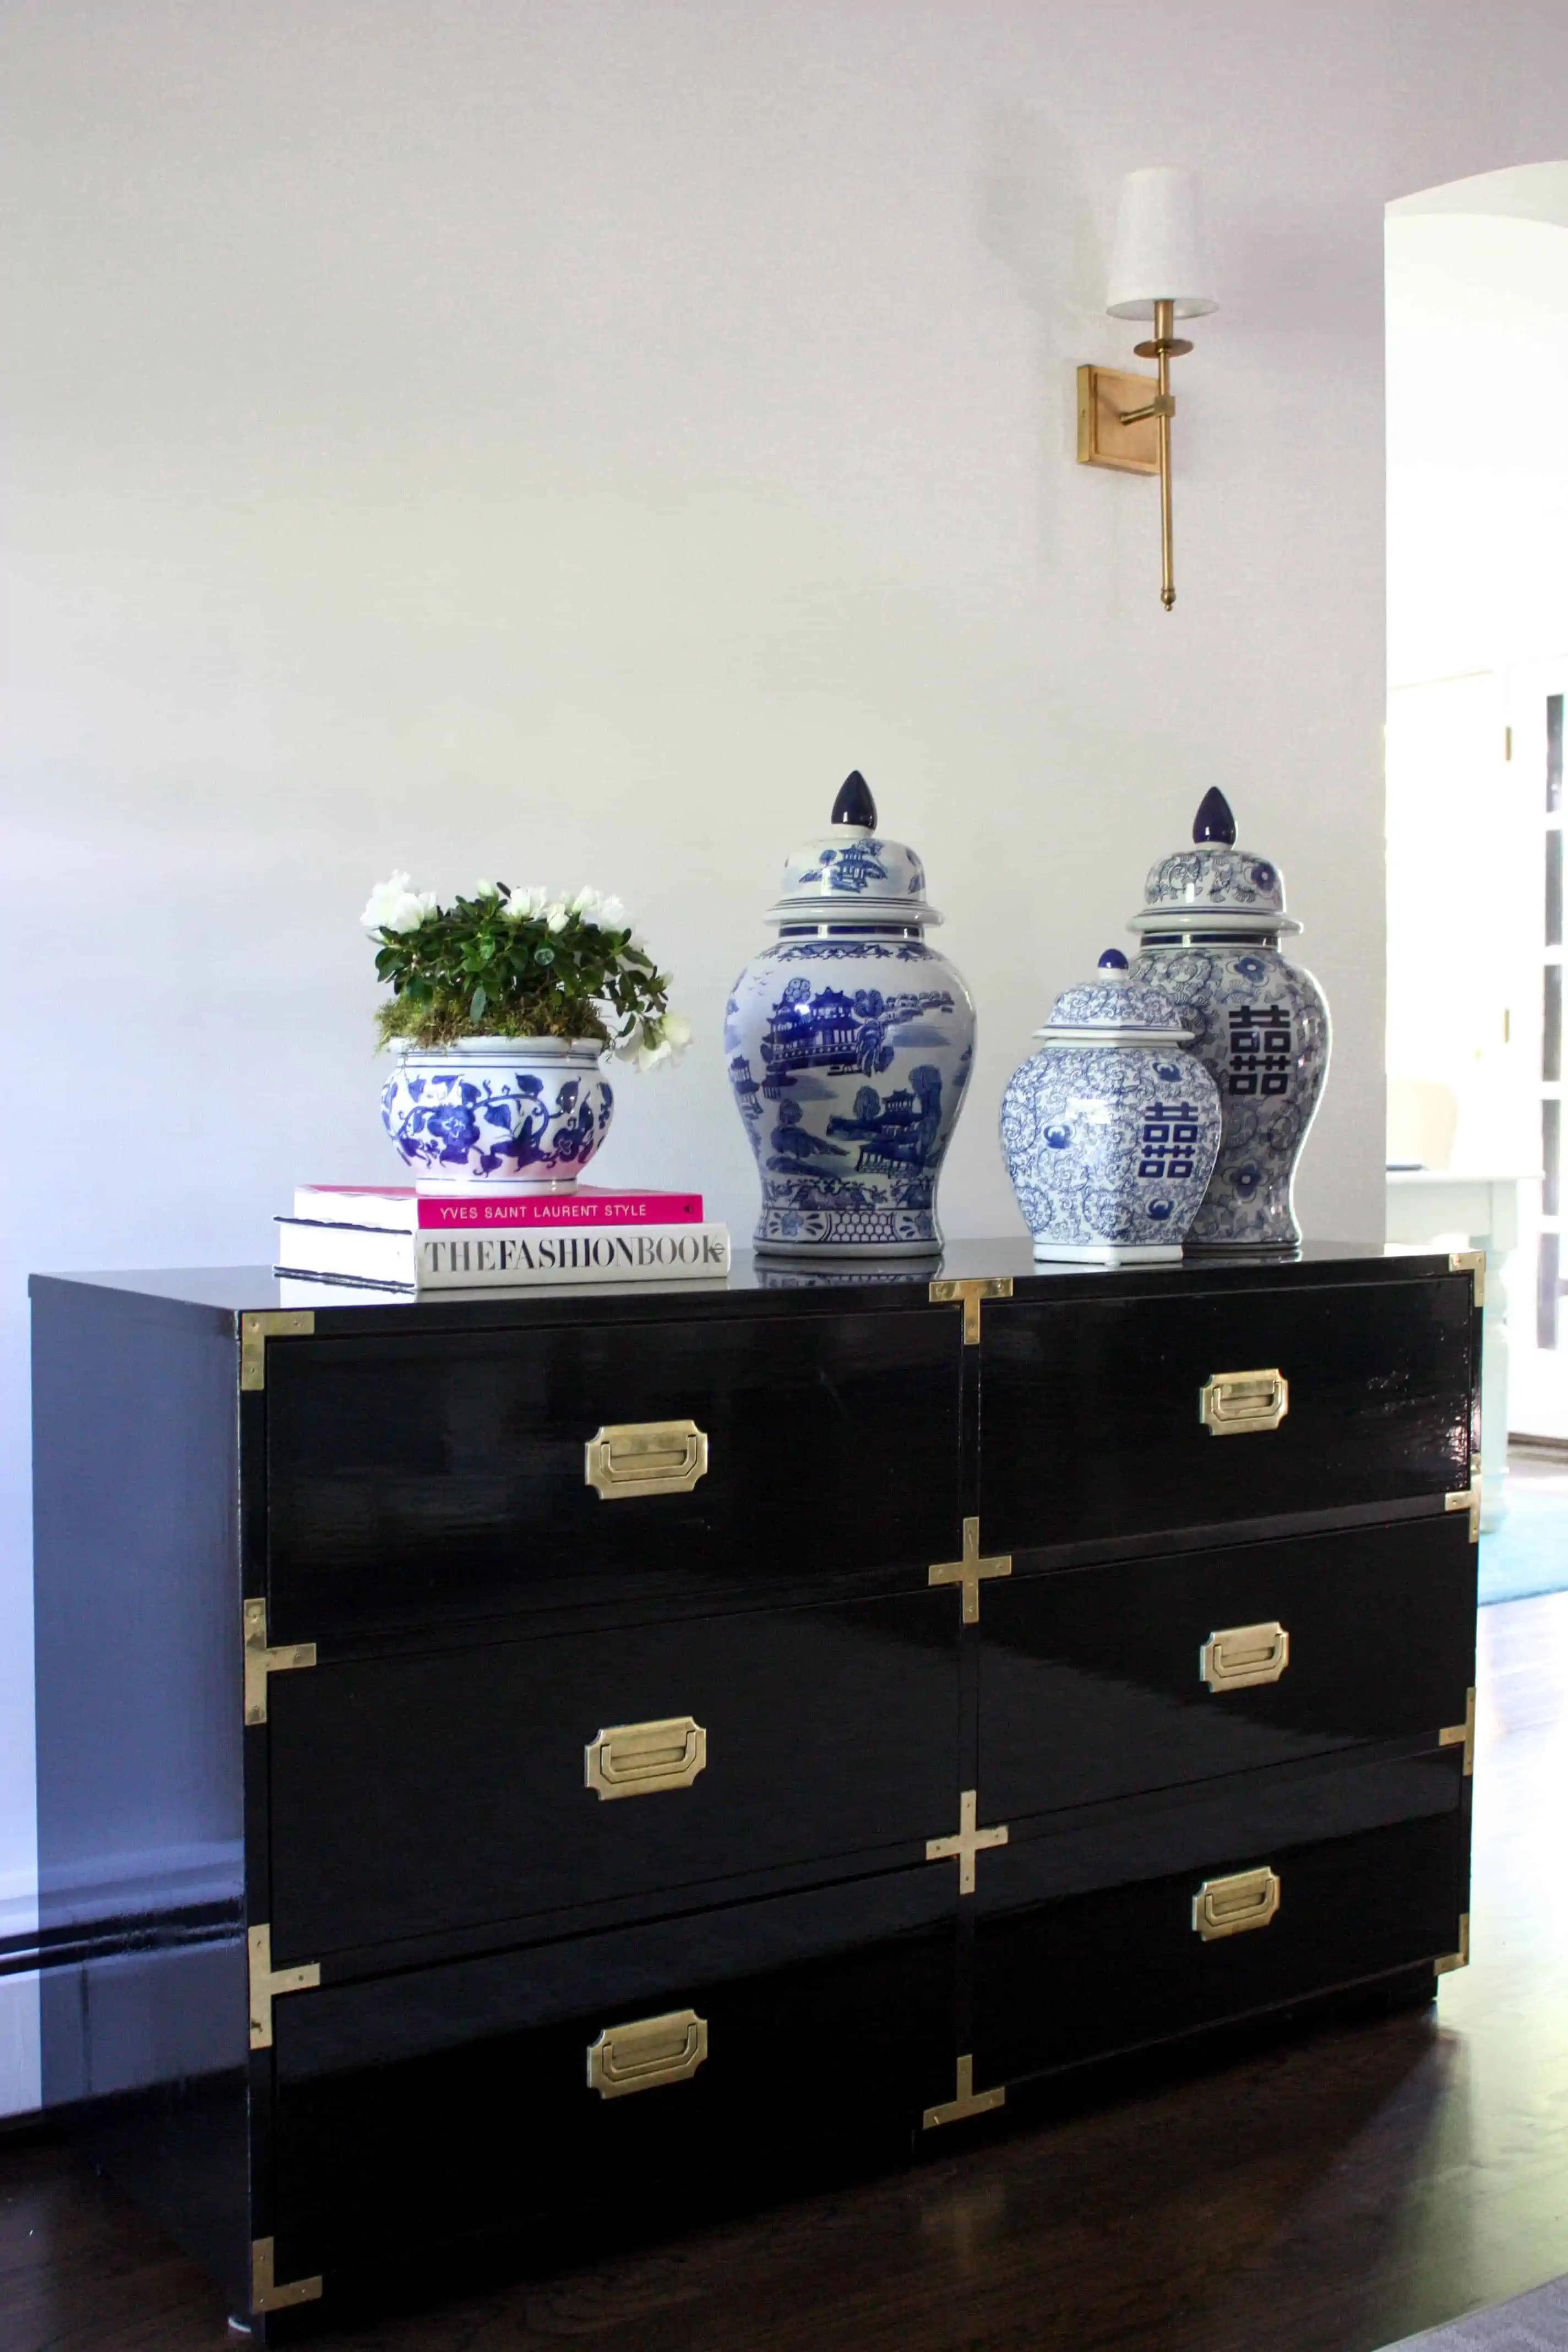
$60 worth of supplies, a little time, patience and a whole lot of elbow grease. This old dresser went from this…
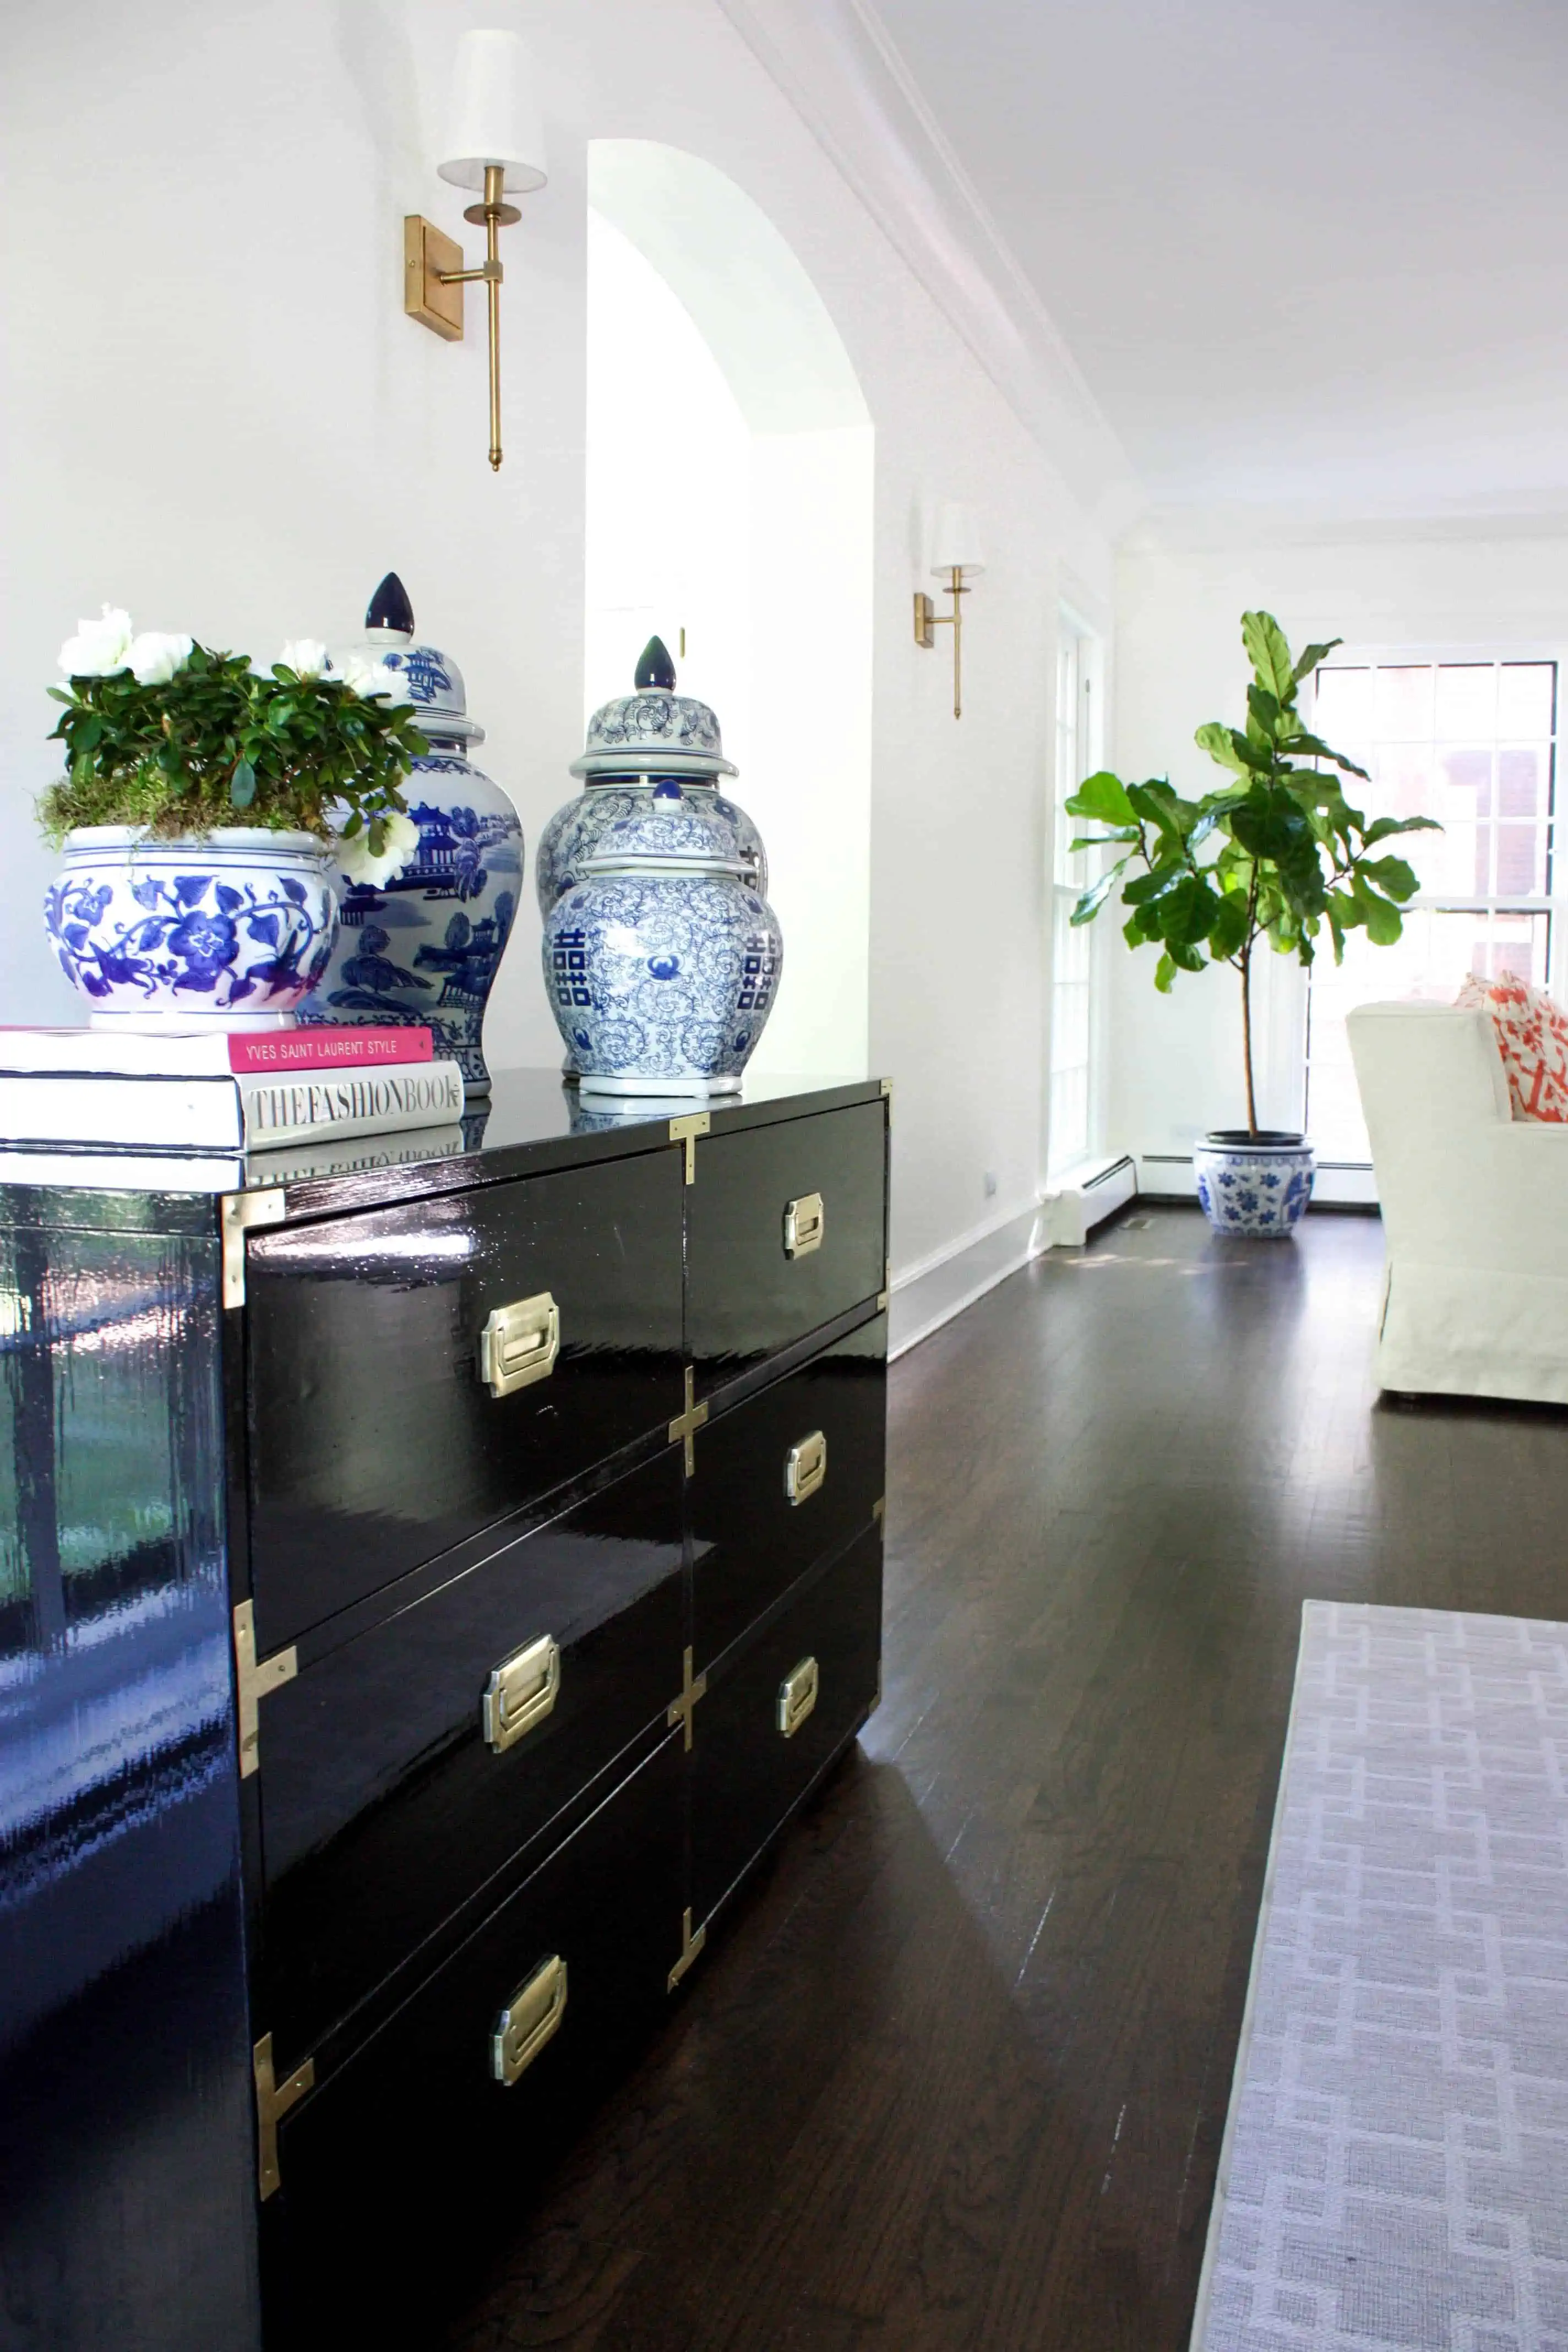
to this…

And here’s how I did it.
How to paint furniture like a boss
What you’ll need
- A good dropcloth
- hammer/pliers/screwdriver (to remove old hardware)
- power sander, or sandpaper (with both 180 and 320 grit)
- Brasso metal polish
- Mineral spirits (if you’re working with oil-based paint as I did)
- Fine Paints of Europe primer (tinted to the color you’ve selected)
- Fine Paints of Europe Hollandlac (or any paint of your choice, I just like the way Fine Paints of Europe works on furniture)
- Mineral spirits (if working with oil-based paint)
- A good quality brush (I like to use a 2 1/2″ brush, by Corona)
How to paint furniture like a boss
- Prep your furniture by removing all hardware, drawers, feet (anything that can be removed). I use a Tupperware container to store all the hardware and then set it aside somewhere safe so I don’t lose any pieces. Most antique pieces of furniture have great quality (and super cool) hardware that can easily be restored with a little elbow grease, so it’s definitely worth your time to remove all hardware with care and keep it set aside somewhere safe. Clean all the surfaces well (including inside drawers)
- Then comes the fun part, sanding! I recently invested in a small power sander, which I love. You can find them at your local hardware store, they’re not expensive and make sanding much more efficient. I like to sand the entire surface (including the faces of all drawers) with 180 grit paper (remember the smaller the number, the rougher the paper. So you start with the lowest number and work up – I start with 180 grit and finish with 320)
- Next, you’ll want to clean the entire surface with either a damp cloth (if using latex paint) or damp cloth with a few drops of mineral spirits added to it (if using oil-based paint)
- Now you are FINALLY ready to paint (well, with the primer that is). I like to break all my painting projects up into sections. So for furniture, I start with the drawers, then move onto the front face, then the sides, and finally the top. You can use a roller for any of these sections, but I personally don’t like the texture rollers leave (even the ones with the smallest nap), so I use a 2 1/2″ brush.
- Paint the entire piece with one coat of primer. Then let everything dry for at least 24 hours before going back and resanding the entire piece of furniture using 320 grit paper. This time sanding by hand (do NOT use a power sander for this).
- Wipe all surfaces clean (either with water or mineral spirits) and then repeat the entire process using your selected paint.
- When you’re painting, be sure to work in long smooth strokes going side to side. And a little paint goes a long way. If your brush is too saturated, the paint will run, especially on things like the sides. So less is more.
- Most paint today works great with just one coat. But if you feel like you need a second coat, wait for the paint to dry at least 24 hours before resanding and repainting.
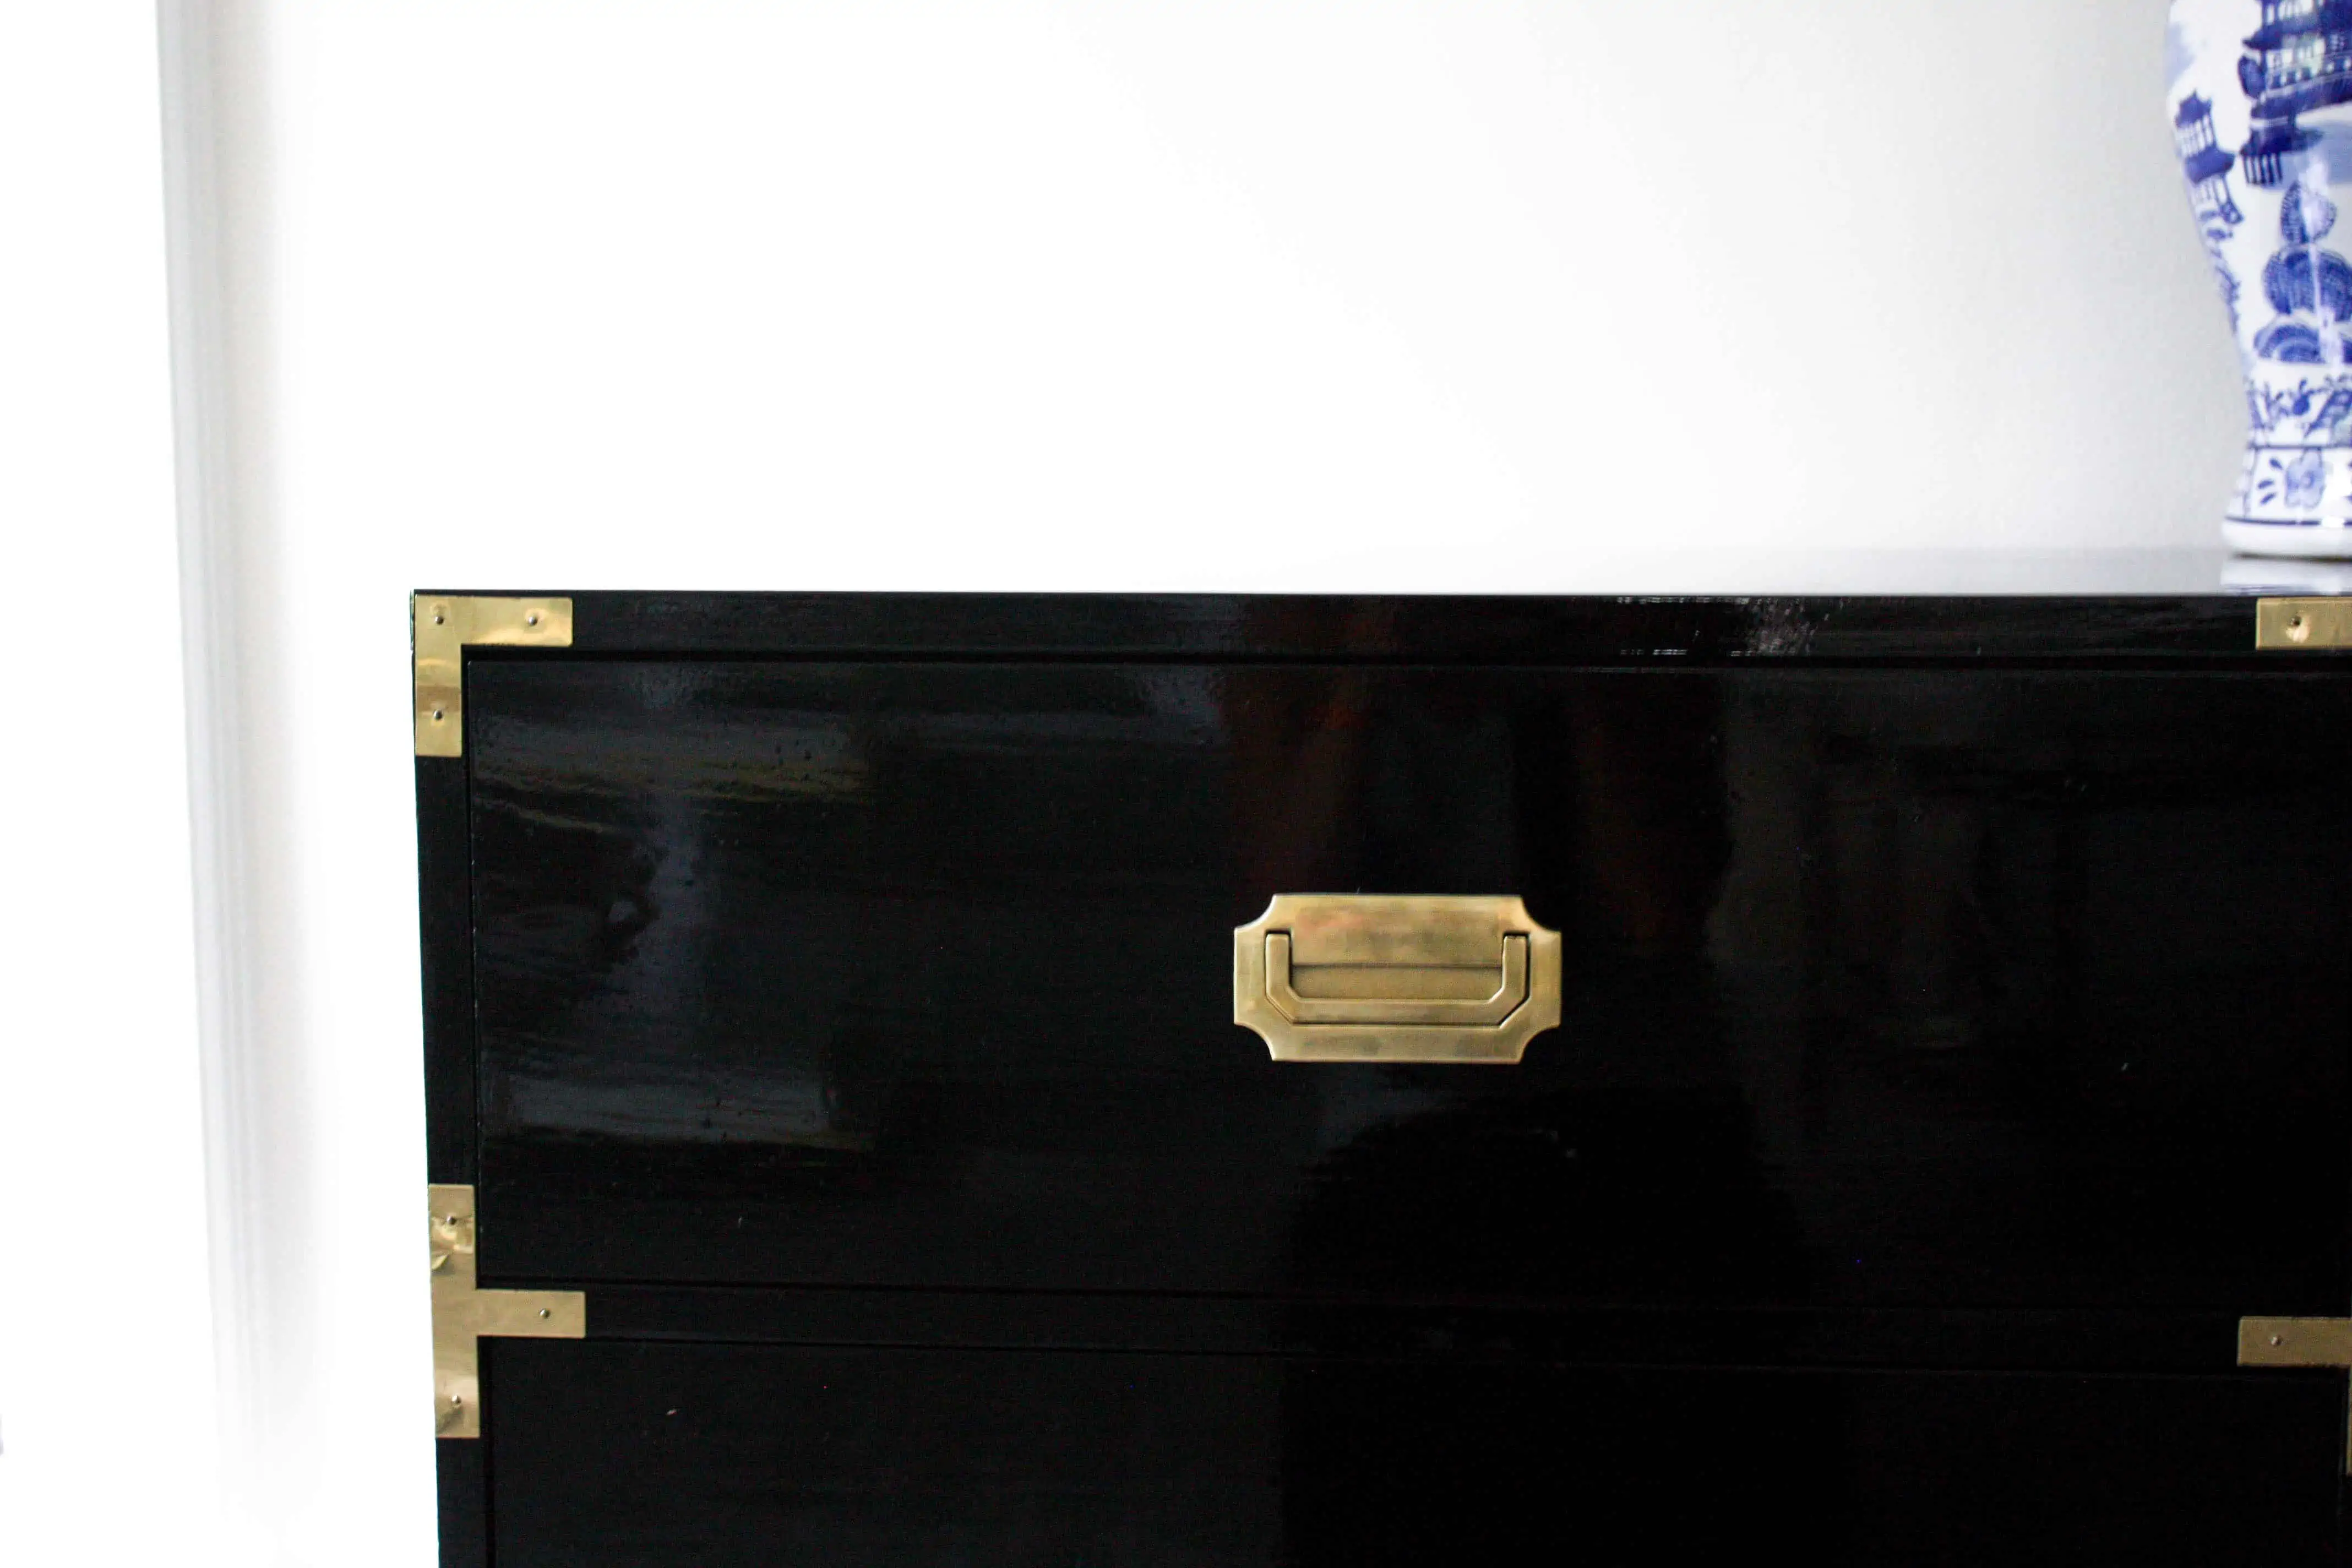
- While you are waiting for the paint you dry, you can work on your hardware. For this particular piece (and almost all that I’ve painted) I’ve had to use Brasso to polish the hardware. A few soft clean rags, a little elbow grease, and Brasso can make even the grimiest of hardware shine like new.
- Once all the surfaces are completely dry (I like to wait at least 48 hours), reapply all of your hardware, reinsert all drawers, attach all feet, etc. Wipe/buff the surfaces on last time and then stand back and admire all of your hard work!
And remember, have a little fun with this. It’s just paint! So don’t be afraid to have a little fun. Our homes are meant to be places we can explore, test things out and have a little fun along the way. So go grab that drop cloth, pick out your favorite color, roll up your sleeves and get after it.
From a girl who loves to wear lipstick, fancy dresses and hates to make a mess in her house – let me be the first to tell you that there is nothing more rewarding than walking by an awesome piece of furniture in your home and thinking; “yeah, I did that!”
For other paint inspiration be sure to check out our blog post on “How to paint your front door” and “Choosing the right white paint”


LEAVE A COMMENT & RATE
Love this piece!! I bet you were excited with the transformation! So fun and beautiful! Good job:))